Quick Summary
To tape shins for marathon training, clean and dry the lower leg, then apply a kinesiology tape strip with its anchor flat at the bottom of the calf above the ankle. Run it up the inner shin along the pain with light stretch, rounding the ends, and avoid wrapping fully around the leg.
- Wash and dry the shin first, since lotions and oils block tape adhesion.
- Round the corners of the strip so it is less likely to peel.
- Anchor the tape flat above the ankle on the outer side of the leg.
- Apply only light stretch over the tender area, not full tension.
- Never wrap tape fully around the leg, because it can restrict circulation.
Table of Contents
- What Shin Splints Are and How Taping May Help During Marathon Training
- Materials Needed: Kinesiology Tape vs. Athletic Tape
- Step-by-Step: How to Tape Shin Splints with KT Tape
- Taping Without KT Tape: Alternatives That Work in a Pinch
- KT Tape for Anterior Shin Splints: Technique Variations by Pain Location
- Managing Training Load and Keeping Your Marathon Plan on Track
- Troubleshooting Tape Problems and When to See a Professional
- Booking a Consultation to Build Your Shin Recovery Plan
- Frequently Asked Questions
What Shin Splints Are and How Taping May Help During Marathon Training
Last Updated: November 18, 2026
Shin splints are one of the most common complaints among runners training for a marathon. The pain sits along the inner edge of the shinbone, the tibia, and usually builds during or after long runs. This guide walks through how to tape shins for marathon training step by step. (Source: medial tibial stress syndrome)
Shin splints are a general term for pain along the shin. The medical name for the most common version is medial tibial stress syndrome (Shin Splints – OrthoInfo). It usually comes from repeated loading of the lower leg, especially when mileage goes up too fast.
Common symptoms include:
- A dull or aching pain along the inner shin
- Tenderness when you press along the bone
- Discomfort that starts early in a run and eases with rest
- Pain that returns the next time you run
Kinesiology tape is an elastic, skin-safe tape. Many runners use it to support the lower leg and to ease discomfort while they train. Tape is a support tool, not a cure. It does not fix the underlying load problem. Think of it as one part of a plan that also includes smart training changes.
Materials Needed: Kinesiology Tape vs. Athletic Tape
Most runners reach for one of two products. Kinesiology tape is thin, stretchy, and designed to move with the skin. Rigid athletic tape is stiff and does not stretch.
Here is a quick comparison:
| Feature | Kinesiology Tape | Rigid Athletic Tape |
|---|---|---|
| Stretch | Elastic, moves with skin | Little to no stretch |
| Range of motion | Full | Limited |
| Best for | Long runs, daily training | Short-term support, race day |
| Removal | Lasts several days | Usually removed after one use |
You will also want a pair of scissors, a clean and dry lower leg, and a pre-cut strip or two of tape.
Step-by-Step: How to Tape Shin Splints with KT Tape
Before you start, wash and dry the shin. Lotions and oils block adhesion.
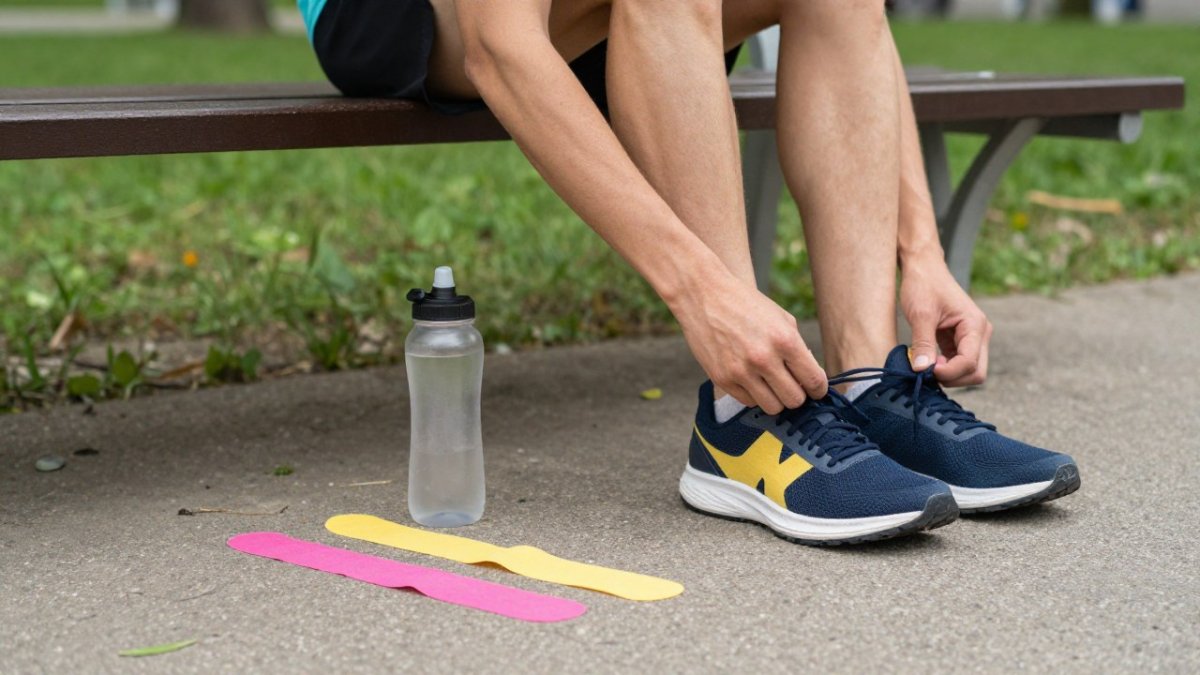
Skin Preparation, Anchor Placement, and Tape Direction
Begin by cleaning the skin. Then cut a strip and round the corners. Rounded corners are less likely to peel. Place the first end of the strip, called the anchor, at the bottom of the calf, just above the ankle on the outer side of the leg. Keep the anchor flat with no stretch.
Run the tape up and along the inner shin, following the direction of the pain. Lay the strip over the tender area without pulling it tight. Stop a few inches below the knee. Many runners use this same path for a simple first attempt. For a version built around running, see a running-specific taping guide, which covers tape direction for training days.
Applying Tension and Securing the Tape Ends
Apply light stretch as you lay the middle of the strip. Too much tension can irritate the skin and cause discomfort. Keep the ends of the tape free of stretch so they hold firmly.
Once the strip is in place, rub the tape briefly to activate the adhesive. Round the tail ends and press them down. Check that the tape does not pinch or wrinkle when you flex your foot.
Watch out: do not wrap the tape fully around the leg. A full circle can restrict circulation, so avoid wrapping fully around the leg.
Taping Without KT Tape: Alternatives That Work in a Pinch
If you do not have kinesiology tape, you can still get support from athletic tape or a compression sleeve. Rigid tape gives more support but less motion, so it is best reserved for short runs or race-day use. A compression sleeve may feel more comfortable on long runs.
Runners on a trail with no supplies sometimes use a sock or a wrapped bandage as a temporary fix. A reference for a related taping approach is 7 Steps to Tape Shin Splints for a Hiking Trip, which covers similar steps for a different activity.
KT Tape for Anterior Shin Splints: Technique Variations by Pain Location
Shin pain is not one condition, and the tape path should follow the tissue that hurts. Shin pain can occur in different locations, and the tape path should follow the tissue that hurts. (Source: evidence-based injury prevention strategies)
Medial Shin Pain (Inner Edge of the Tibia)
This is the classic medial tibial stress syndrome pattern: a diffuse ache along the inner border of the shinbone, tender to press, worse early in a run and after long efforts. For this pattern, the strip can be run along the inner shin following the line of discomfort, with the anchor kept flat and light stretch applied over the tender zone.
Anterior Shin Pain (Front of the Lower Leg)
Anterior pain sits on the front or outer-front of the shin, often in the muscles beside the tibia rather than on the bone itself. It is common in runners who increase downhill volume, change stride, or ramp speed work quickly. For this pattern, the strip can run up the front of the shin toward the knee, with the stretch placed over the sore muscle rather than over the bone.
How to Tell Which Pattern You Have
Press gently along the inner bone edge and then along the front muscle compartment. Pain that is pinpoint on the bone and worsens with hopping or with a hard landing is a reason to stop and get assessed rather than tape over it.
Watch out: if anterior pain comes with tightness, numbness, or a feeling of pressure in the front compartment that builds during a run, remove the tape and stop the session, that pattern needs a professional evaluation, not a tighter strip.
Test any variation on an easy run first. If the tape changes your stride or makes the pain sharper, take it off and try the other route. A comfortable fit matters just as much when choosing tape for a full weekend of activity, so Bleacher Moms Minimart can help you think through what to look for before tournament days.
Managing Training Load and Keeping Your Marathon Plan on Track
Tape is a support tool, not a training plan. The runners who get through a marathon build with shin pain are usually the ones who change the load at the same time they add tape, rather than taping over an unchanged week. Shin symptoms can track with how quickly weekly mileage and hard effort rise, so one first step is to flatten that curve.
A Practical Load-Adjustment Framework
- Hold weekly mileage at its current level for one to two weeks instead of continuing to build.
- Cap the long run at the distance that last felt comfortable, and keep it there until pain during and after runs settles.
- Replace one quality session per week with easy running or cross-training for two to three weeks.
- Avoid adding hills and speed work in the same week; change one variable at a time.
- Keep a simple log of pain during runs, after runs, and the next morning. A pattern of morning pain that is worse than the day before is a signal to back off further.
Return-to-Running Progression
When pain has been mild and stable for about a week, rebuild gradually. Gradual rebuilding of weekly volume and long runs is a common approach. If symptoms return, drop back to the last pain-free week rather than pushing through.
Strength, Mobility, and Footwear
Taping works best alongside a strength routine that targets the calf, foot, and hip. Calf raises, single-leg balance work, and hip stability exercises are the usual starting points, done two to three times per week on easy days. Check footwear for worn-out midsoles; a shoe that has lost cushioning changes how load reaches the shin. Rotating in a fresher pair for long runs is a low-cost experiment many runners find helpful.
What Tape Can and Cannot Do
Kinesiology tape may ease symptoms for some runners, but it does not repair bone or change tissue capacity. Treat it as a bridge that lets you keep some training while you fix the load, not as a substitute for the changes above.
Red Flags: When to Stop Running and Seek Care
Stop running and see a licensed healthcare provider if you have persistent pain, swelling, or pain at rest, or if symptoms do not improve with reduced load. These signs can point to a stress injury or another cause that taping will not address. If shin pain persists after taping, How To Treat Runner Shin Splints Naturally describes non-tape options to discuss with your provider.
Active recovery can also help. How to Create an Effective Active Recovery Plan explains how to build recovery days around a training block. Some athletes also ask about manual therapies. Cupping for Athletes: 7 Key Benefits for Recovery covers how cupping is used in recovery settings. Ask a qualified professional whether these options fit your situation.
Troubleshooting Tape Problems and When to See a Professional
Tape that peels early can be caused by oily skin, lotion, or sweat. Clean the leg again and try rounding the corners more. Itching or redness often means the tape is too tight or left on too long. Remove it and let the skin rest.
If pain continues after two to three weeks of rest and tape, or if the pain is sharp, the area is swollen, or pain occurs at rest, stop running and see a licensed healthcare provider. Shin pain can have causes beyond shin splints, including stress fractures. If shin pain persists after taping, How To Treat Runner Shin Splints Naturally describes non-tape options to discuss with your provider.
Booking a Consultation to Build Your Shin Recovery Plan
Shin pain can slow down marathon training, but a clear plan usually helps. Book a consultation with a qualified professional to talk through your symptoms and your training schedule.
Frequently Asked Questions
Does taping shin splints actually help?
Taping may offer some short-term support and a sense of relief for shin discomfort, and some runners find it useful during training. Evidence specifically for kinesiology tape on shin splints is limited, so tape should be treated as one tool rather than a fix. Taping does not address the training load that usually causes shin splints. If pain is sharp, persistent, or worsens during runs, schedule a consultation with a qualified professional to rule out more serious conditions before relying on tape.
How do I tape my shins for marathon training?
Start with clean, dry skin and cut two or three strips of tape. Anchor the first strip near the inner ankle, then apply light tension as you wrap upward along the inner shin, following the direction of the muscle fibers. Keep the stretch modest and avoid tight wraps that restrict circulation. Secure the ends without stretch. Taping before a long run can help you feel supported, but adjust the routine to your comfort and stop if numbness, tingling, or swelling appears.
How do I tape shin splints without KT Tape?
Athletic tape or a compression sleeve can provide similar external support when kinesiology tape is not available. Athletic tape is less elastic, so apply it with minimal tension and leave room for the calf to move. Compression sleeves are easier to reuse and avoid adhesive irritation. Whichever option you choose, check skin after removal and keep the wrap snug rather than tight. Shin discomfort that does not improve with support should be evaluated by a qualified professional.
How long should kinesiology tape stay on?
Kinesiology tape is typically designed to stay on for several days, though wear time varies with skin type, sweat, and activity. Remove it if you notice itching, redness, blistering, or skin irritation. Peel slowly in the direction of hair growth and use oil-based remover if the adhesive is stubborn. Reapply with fresh skin preparation before each training block. If you have sensitive skin or a medical condition, check with a qualified professional before using tape regularly.