Quick Summary
To tape shin splints for hiking, clean and dry the inner shin, then apply kinesiology tape in a Y-strip with light tension, anchored just below the knee. Leave the back of the leg open, and reapply before the hike if the tape loses grip.
- Clean the inner shin with an alcohol wipe and let it dry fully before taping.
- Round the corners of each strip so the edges do not peel.
- Avoid wrapping tape in a full circle, and check for numbness or color change.
- Kinesiology tape is usually the better first choice for all-day hiking comfort.
- Stop and seek assessment for sharp, localized bone pain or pain at rest.
Table of Contents
- What Shin Splints Are and How They Affect Hikers
- Can You Hike With Shin Splints? Terrain, Pace and Pain Limits
- Best Tape for Shin Splints: Kinesiology vs Rigid Strapping
- How to Tape Shin Splints: Step-by-Step Application
- How Long to Leave Kinesiology Tape on Your Shin
- Pre-Hike and On-Trail Checklist for Taped Shins
- Evidence, Realistic Expectations and When to Get Assessed
- Booking a Professional Assessment Before Your Next Trail
- Frequently Asked Questions
What Shin Splints Are and How They Affect Hikers
Last Updated: November 16, 2026
Shin splints are a common cause of pain along the inner edge of the shin bone. Hikers feel it as an ache or sharp soreness that builds during steep climbs and long descents. This pain can derail a planned trip, so it helps to understand what is happening first. (Source: medial tibial stress syndrome)
The medical term is medial tibial stress syndrome (Shin Splints – OrthoInfo). It describes irritation of the muscles, tendons and bone tissue that attach along the tibia. Repeated loading, especially on hard or uneven ground, places stress on those tissues faster than they can recover.
Common signs include:
- Dull or achy pain along the inner shin
- Tenderness when you press along the bone
- Discomfort that starts during activity and eases with rest
- Soreness that returns the next morning
Hikers feel shin splints most on downhill stretches. The tibialis anterior muscle works hard to control each step, which adds load to the front of the lower leg. A heavy pack makes the problem worse.
A common mistake is pushing through the pain until the trip is over. Pain that worsens with each mile is a signal to change your plan, not a sign of toughness.
Can You Hike With Shin Splints? Terrain, Pace and Pain Limits
You can often hike with shin splints if the pain stays mild and does not change how you walk. The key is matching the trail to your current tolerance.
Flat, soft surfaces are the easiest starting point. Packed dirt and gentle grades put less force through the shin than rocky descents or loose gravel.
Use these simple limits to guide your decisions:
- Keep the pain mild during the hike
- Stop if the pain sharpens, changes location or causes a limp
- Choose shorter distances and slower paces on steep terrain
- Avoid long downhill sections until the shin settles
Pace matters as much as distance. Taking shorter steps reduces impact on the lower leg. Hiking poles can take some load off the shins on descents.
Best Tape for Shin Splints: Kinesiology vs Rigid Strapping
Two tape types come up most often for shin pain: kinesiology tape and rigid strapping tape. Each works differently, so choose based on your goal.
Kinesiology tape is flexible and stretches with the skin. Many hikers prefer it because it allows a full range of motion and can be worn for several days. It is a good choice for comfort during long days on the trail.
Rigid strapping tape is firmer and offers more restriction. Some people use it for short outings when they need extra stability. It does not stretch, so it can feel tight during climbs.
| Tape Type | Stretch | Best For | Typical Wear Time |
|---|---|---|---|
| Kinesiology tape | High | All-day comfort, full motion | Several days |
| Rigid strapping tape | Low | Short hikes needing firm support | One outing |
For most hikers, kinesiology tape is the better first choice. Check the product label for brand-specific wear guidance.
How to Tape Shin Splints: Step-by-Step Application
Taping works best as part of a plan that includes rest and gradual training. The sequence below is written for hikers, so it accounts for pack weight, long descents, and sweaty skin under gaiters or pants.
What you will need:
- Kinesiology tape or rigid strapping tape
- Sharp scissors with rounded tips
- Alcohol wipes or a clean, dry cloth
- Optional: skin barrier wipe or liquid bandage for sensitive skin
Preparing Your Skin and Positioning the Leg
Clean the inner shin with an alcohol wipe and let it dry fully. Oil, lotion, sunscreen, or sweat can stop the tape from sticking. If you have sensitive skin, apply a skin barrier wipe and let it dry before taping.
Sit with your leg straight and your foot flexed toward your shin (dorsiflexed). This stretches the muscles along the shin so the tape sits flat. For the second strip, you can plantarflex slightly to open the space along the lower shin.
Watch out: Taping over unwashed skin or applied sunscreen is the most common reason tape peels within the first hour of a hike.
Measuring, Cutting and Applying the Strips
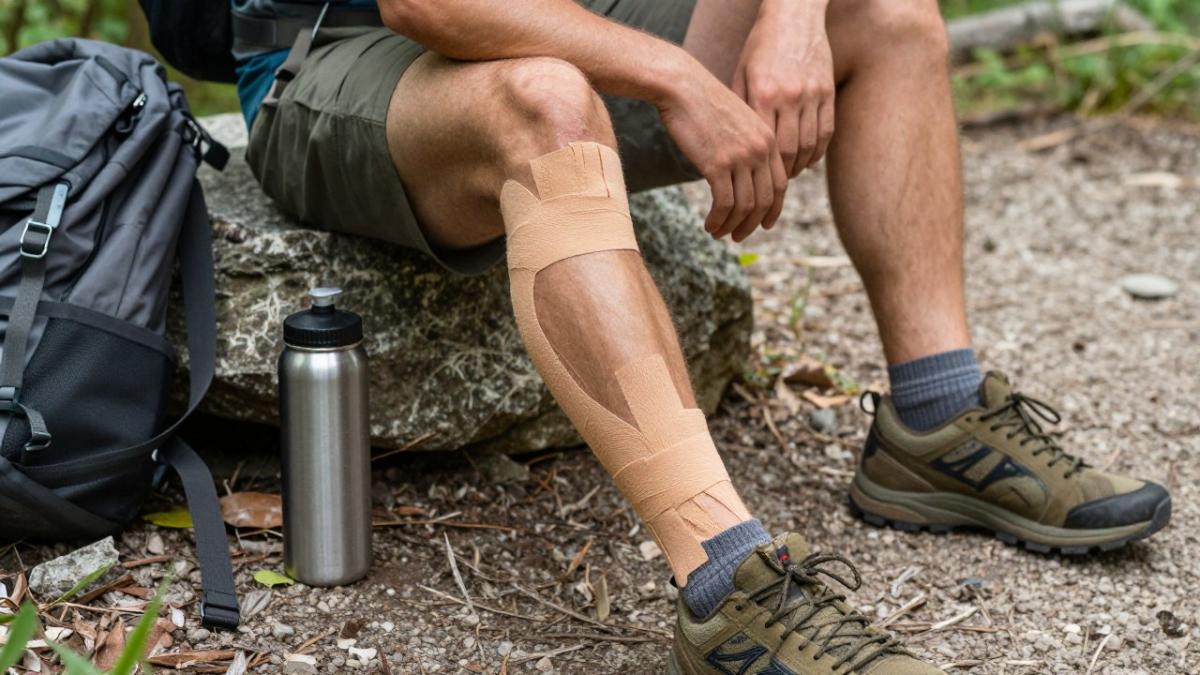
Measure a strip from just below the knee to a point about a hand’s width above the ankle. Round the corners of each strip so the edges do not peel. For a Y-strip, cut a strip roughly 1.5 times the length of the shin and split one end down the middle for about a third of its length. (Source: American Academy of Orthopaedic Surgeons)
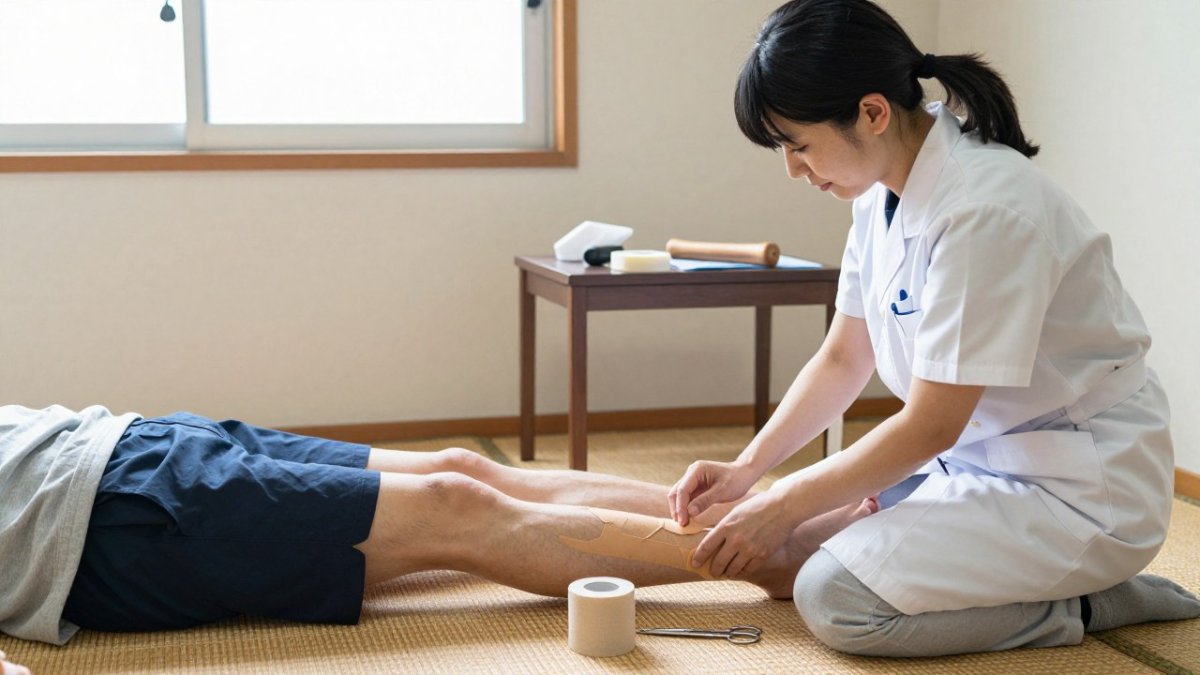
Apply the first strip along the inner shin with no tension at the anchor end (the end near the knee). Pull gently as you lay the tape down the bone, then rub the strip firmly to activate the adhesive.
Add a second strip in a Y shape if the pain is wide, overlapping the first gently. For hiking, place the anchor of the Y-strip just below the knee and fan the two tails along either side of the tibial ridge, following the line of the tibialis anterior and posterior muscles. Keep tension light on the tails so the tape does not restrict ankle motion on climbs.
If you use rigid strapping tape, apply it with minimal stretch and anchor it firmly above and below the painful area. Rigid tape does not stretch, so it can feel tight during steep climbs; test it on a short walk before a long hike.
Watch out: Wrapping tape in a full circle around the lower leg can restrict circulation. Keep strips open at the back of the leg and check for numbness, tingling, or color change.
Hiking-Specific Adjustments
For long descents, add a strip along the front of the shin (over the tibialis anterior) with light tension to reduce muscle vibration. For steep climbs, keep the ankle free to dorsiflex by avoiding tape that crosses the front of the ankle joint.
If you wear gaiters or high boots, apply tape at least 30 minutes before putting them on so the adhesive sets and the tape does not roll under friction. Carry a spare pre-cut strip in a zip-top bag; sweat and rain will loosen edges over a long day.
How Long to Leave Kinesiology Tape on Your Shin
Kinesiology tape is commonly worn for several days. Remove it sooner if your skin itches, blisters or turns red, and follow the product label’s guidance.
Replace the tape before a hike if it has lost its grip. Tape that has been on too long may stop providing support.
Pre-Hike and On-Trail Checklist for Taped Shins
Use this checklist before and during your trip:
- Apply tape at least one hour before the hike
- Pack spare tape, scissors and an alcohol wipe
- Choose a trail that matches your current comfort level
- Bring hiking poles for steep descents
- Carry extra water and snacks to avoid fatigue
- Check the shins at each rest stop
- Plan a rest day after the hike
If the tape begins to bunch or peel on the trail, stop and reapply it. Carrying a small roll of extra tape can prevent a long walk with poor support.
Evidence, Realistic Expectations and When to Get Assessed
The research on taping for shin splints is limited, and results vary from person to person. Tape may help some hikers feel more comfortable, but it does not fix the underlying cause. Taping is generally considered most useful alongside load management, gradually increasing mileage, strengthening the calf and foot muscles, and choosing softer surfaces early in a training block.
A common pattern is that tape helps most in the short term, during a single outing or a few days of reduced activity. It is not a substitute for rest or for addressing training errors such as a sudden jump in pack weight or downhill mileage.
Warning Signs That Warrant Stopping
Stop hiking and seek assessment if you notice any of the following:
- Sharp, localized pain at a single point on the bone, especially if it persists at rest
- Pain that worsens with each mile rather than easing
- Swelling, redness, or warmth along the shin
- Numbness, tingling, or color change in the foot while tape is on
- Pain that occurs at rest or wakes you at night
These signs can indicate a stress fracture or another condition that taping will not help and may worsen. Do not tape through focal bone pain or pain at rest.
See a qualified healthcare professional if pain persists for more than a few weeks, comes with swelling or numbness, or occurs at rest. Sharp, localized bone pain can signal a stress fracture, which needs medical evaluation (Broken bone: MedlinePlus Medical Encyclopedia).
General information on this page cannot replace an individual assessment.
Booking a Professional Assessment Before Your Next Trail
If shin pain is holding back your hiking plans, a professional assessment can help you understand your options. A qualified healthcare provider can talk with you about your symptoms and options. You can book a session to discuss your goals.
For more on taping technique, see how to tape shin splints for running support. Reviewing natural ways to treat runner shin splints and contrast water therapy for sore muscles can also help you plan recovery around your trip.
Quick Summary: Shin splints cause pain along the inner shin during hikes. Kinesiology tape is often the best starting choice, and a checklist helps you plan each trip safely.
BUTTON: Book Your Session
CARD_TITLE: Ready to hike with less shin pain?
CARD_TEXT: Source Acupuncture offers recovery support for sore muscles and tension.
Frequently Asked Questions
Will taping my shins help with shin splints?
Taping may help some people feel more support and less discomfort during activity, but evidence is limited and results vary. Tape is a short-term aid, not a fix for the underlying cause. Rest, load management, footwear review and a visit to a qualified provider are still the core steps. If pain persists or worsens, have a clinician evaluate the leg before relying on tape to get you through a hike.
Can you go hiking with shin splints?
Many people can hike with mild shin discomfort by choosing flatter terrain, shorter distances and slower pacing, but sharp pain, swelling or pain that worsens as you walk is a signal to stop. Hiking on steep descents or uneven rock places extra load on the shin. Build back gradually, and if symptoms do not settle over several days, get the leg assessed before attempting longer trails.
What is the best tape for shin splints?
Most people use elastic kinesiology tape because it stretches with the leg and stays on through sweat and movement. Rigid strapping tape gives firmer, less flexible support and is often used by athletic trainers. Choose a tape you can apply without skin irritation, test it at home before the trip, and remember that the right choice depends on your comfort and the advice of a qualified provider.
How long should you leave kinesiology tape on your shin?
Kinesiology tape is commonly worn for several days, and many people remove it sooner to limit skin irritation. Remove it sooner if you notice itching, blistering or redness. Peel it slowly in the direction of hair growth, or use oil-based remover. Do not reapply over irritated skin, and stop using tape if discomfort continues.